


I have a confession to make: organization does not come naturally to me.
To give you a better idea of what exactly we’re talking about here, this is what my phone home screen looks like on any given day:
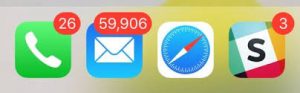
Not too pretty.
In fact, the above screenshot gave a few of my more inbox-zero-inclined, Evernote-addicted co-workers a good fright (Sorry, Braden!).
I love the idea of being a person who can take joy in meticulously structuring and optimizing my day via an elaborate bullet journal system, but realistically, I’ll never be. I just go where my Google Calendar tells me to go. I send myself one-off reminders via cryptic email and Slack messages (“email that person you talked to in hall”). I keep track of meeting notes in a series of disconnected spreadsheets. I bookmark Gmail conversations I need to respond to. And when all else fails, I write stuff on my arm.
This (reckless) combination of messages and documents has served me (surprisingly) well, but there’s always room for improvement.
To see if I could structure my work life with a bit more intention, I recently started using Google Keep, Google’s free note-taking app.
The biggest draw of Google Keep compared to other popular note-taking apps is its simplicity. The interface is minimal and intuitive, enabling you to start taking and organizing notes with little (if any) learning curve.
While more robust applications like Evernote offer third-party integrations and additional features for curating advanced databases of notes, Google Keep’s clean, straightforward system is ideal for someone looking to simply keep track of their daily tasks and collaborate with small teams. For users interested in building out a serious archive of content across a larger organization, Google Keep’s capabilities will likely be too limited for anything beyond personal use.
If you’re interested in giving Google Keep a whirl, this guide will walk you through getting started, along with some helpful tips to get the most out of the app.
Getting Started With Google Keep
First things first: you can access Google Keep right here (just make sure you’re logged into your Google account).
Once you log in, you’ll see an area to create notes:
![]()
Clicking into the box will automatically start a text note. The paintbrush icon on the left will start a drawing note, and the image icon will start an image-based note.
Once you decide on the type of note you want to create, at the bottom of the note-taking area you’ll see options to:
- Set a reminder for a specific time or place
- Add a collaborator
- Change the color of the note
- Add an image to the note
- Archive the note
- “More” = add a label, add checkboxes, add a drawing
- Undo
- Redo
- Pretty simple, right? Once you click out of the note-taking area, your note will be automatically added to the Google Keep screen and synced across any devices where you’re using the same Google account and logged into Google Keep.
- Although these features are fairly bare-bones compared to other applications, they enable you to curate a wide variety of different tasks, to-dos, and reminders.You can edit any type of note at any time simply by clicking into it.
Let’s take a deeper look at how these features can be used to organize your tasks and improve your overall efficiency.
-
1. Pin to prioritize.
When it seems like you have a million things on your to-do list, tackling each task in the order you added them to the list isn’t usually the most effective approach. Some tasks are simply more pressing or time-sensitive than others, and your to-do list should reflect this.
With Google Keep, you can keep your tasks prioritized using the “pin” feature. Hover over any note, and click the pin icon that appears in the upper right hand corner of the note.
- This will add the note to a separate “Pinned” section above the rest of your notes. Pinned notes will remain in this section until you delete or unpin them. It’s certainly a humble organization feature, but I’ve found that pinning my most important tasks at the beginning of each day has helped me prioritize my time more effectively.
2. Break up larger tasks into smaller tasks.
Got a particularly big, complicated, or just plain tedious task you need to tackle? Break it up into little parts.
- This is one of my absolute favorite ways to make it through my more complex to-do list items or group related tasks together in one bucket. Using Google Keep’s list feature, I create a new “list” note card, which creates a little checklist inside a single note. To create a hierarchy of checklist items, you can drag items to nest them under other items.
3. Share notes with team members to keep them updated.
Google Keep has a useful collaboration feature that allows you to share a note directly with another Google user. I’ve found this tool to be particularly helpful when you need to keep a colleague up to date on your progress or send someone a friendly reminder.
To add a colleague to a note, just click on the “+” person icon at the bottom of any note. Collaborators have the ability to make changes once you add them to the note.
- If your team is already using other Google tools, the collaborate feature in Google Keep can be easily integrated into other areas of your team’s processes without having to adopt a new tool to stay connected.
4. Add annotations to images.
Google Keep allows you to add annotations directly to images — a valuable time-saver if you work on a creative team that regularly deals with visual content. This can save time when you need to make a comment about a particular aspect of an image, since you don’t need to describe it — you can draw directly on the area you want to highlight.
To add an annotation to an image, click on your image note in Google Keep to expand. In the upper right corner of your screen, you’ll see a pen icon (right next to the printer icon):
-
5. Use date-based reminders to keep yourself on track and structure your day.
Need to keep track of a big deadline? Or maybe you just need some little reminders to keep you on track throughout the day? I use Google Keep’s date and time-based reminders as a helpful nudge when I need it — for both larger projects, and smaller things I need to remember to get done.
To set one up, click on the alarm bell icon at the bottom of any note, and you’ll get a menu to select a time and date to get reminded.
-
6. Set a location-based reminder.
If you move from place to place throughout your day and want reminders when you get to a specific location, you can set that up in Google Keep. Just from the same menu in the previous step, just select “Pick Place” and select the location you want to get a reminder at.
I’ve found this feature is useful for a wide variety of errands — like reminders to buy something when you get to the grocery store, or a reminder to check up on an outstanding work task when you get into the office the next day. Just remember to have your Google-connected device with you, and location settings turned on to receive these reminders.

Mathew Hicks is a world-renowned author and expert in the field of business and finance. He has written multiple books and articles on the subject and has been featured in numerous publications. His expertise has been sought by leading financial institutions around the world.